Problem
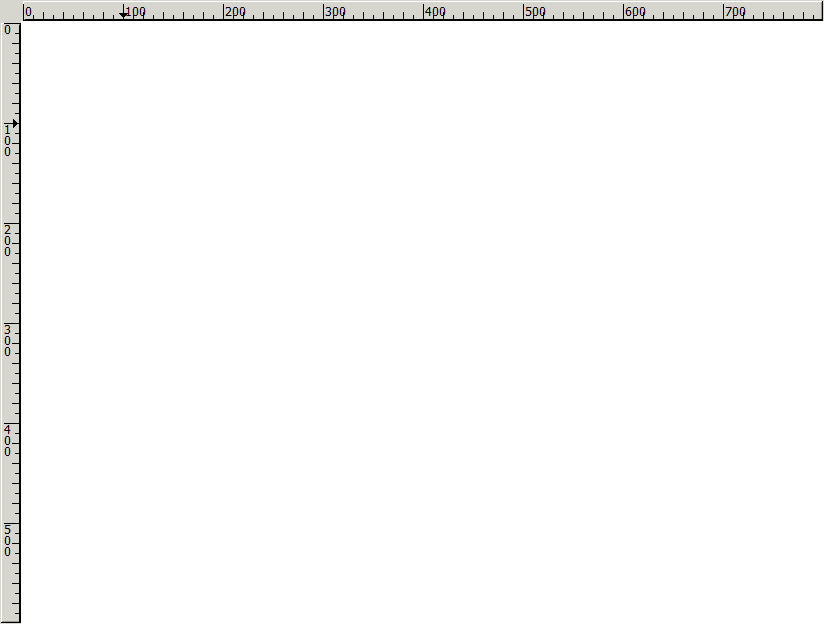
You can switch between a horizontal and vertical screen ruler in Part 3. Now you would like to be show both the horizontal and vertical rulers at the same time as shown below. This example also shows how to have a non-rectangular or odd-shaped window with some parts of the window being "transparent".
Solution
This example makes use of the technique as described in the article How to create a round button - Part 1? to create a non-rectangular or odd-shaped window with some parts of the window being "transparent".
- Create a horizontal ruler and a vertical ruler and pack them into the GtkWindow such that the horizontal ruler stays on top, and the vertical ruler stays on the left.
- Create a mask for the area below the rulers that will become transparent, and save the mask as a gif/png file that supports transparency.
- Load the mask with GdkPixbuf::new_from_file (mask_filename).
- Create the mask with render_pixmap_and_mask.
- Mask out the area below the rulers with shape_combine_mask.
Sample Code
Note: The mask image used by this example is: ruler_mask2.png. This image file is required by the sample code below. Please save a copy of the image file and put it in the same directory where you store the sample code.
| 1 2 5 6 7 8 9 10 11 12 13 14 15 16 17 18 19 20 21 22 23 24 25 26 27 28 29 30 31 32 33 34 35 36 37 38 39 40 41 46 47 48 49 50 | <?php $window = new GtkWindow(); $window->connect_simple('destroy', array('Gtk','main_quit')); $hruler = new GtkHRuler(); // note 1 $hruler->set_range(0, 800, 100, 1024); $hruler->set_size_request(800, 20); $hbox1 = new GtkHBox(); $vbox_corner = new GtkHBox(); // note 2 $vbox_corner->set_size_request(20,20); $hbox1->pack_start($vbox_corner, 0, 0); $hbox1->pack_start($hruler, 0, 0); $vbox = new GtkVBox(); $vbox->pack_start($hbox1, 0, 0); $vruler = new GtkVRuler(); // note 3 $vruler->set_range(0, 600, 100, 800); $vruler->set_size_request(20, 600); $hbox2 = new GtkHBox(); $hbox2->pack_start($vruler, 0, 0); $hbox2->pack_start(new GtkLabel()); // note 4 $vbox->pack_start($hbox2, 0, 0); $eventbox = new GtkEventBox(); // note 5 $eventbox->add($vbox); $eventbox->connect('motion-notify-event', 'on_motion', $window); $window->add($eventbox); $pixbuf=GdkPixbuf::new_from_file("ruler_mask2.png"); // note 6 list($pixmap,$mask)=$pixbuf->render_pixmap_and_mask(255); // note 7 $window->shape_combine_mask($mask, 0, 0); // note 8 $window->show_all(); Gtk::main(); function on_motion($widget, $event, $window) { $window->set_title("php-gtk2 Screen Ruler. x=$event->x y=$event->y"); return true; } ?> |
Output
As shown above.
Explanation
This example makes use of the code in How to create a round button - Part 1?.
What's new here:
- Set up the horizontal ruler.
- This is the corner at the junction of the horizontal and vertical rulers. Stuff both of these into
$hbox1. - Set up the vertical ruler.
- This empty GtkLabel helps to make sure the vertical ruler stays at the left of the window. Stuff the vertical ruler and this GtkLabel into
$hbox2. - Pack both
$hbox1and$hbox2inside a$vboxand stuff the$vboxinside an eventbox so that we can track the mouse position. - Load the mask image.
- Create the mask.
- And mask out the area below the rulers.
Read more...